 Print This Post
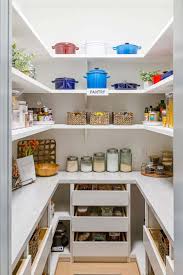
My kitchen pantry is currently a mess, and I suspect it doesn’t look typical since I only have jars full of dry bulk foods. Today, I’m dedicating at least 15 minutes to tackle this project.
1. **Remove Everything from the Pantry**
The first step in organizing your pantry is to take everything out. One benefit of this is that you’ll handle each item, allowing you to check if any containers are empty or outdated. This step will also motivate you to finish the job quickly so you can use your kitchen again!
2. **Scrub Down the Pantry**
Pantries tend to get very dirty, so this is a perfect time to wipe down the walls, shelves, and even the floor. If you’re tempted to skip this step, remember it could be another three years before you feel motivated to clean the pantry again!
3. **Determine Which Items You Use Often**
As you restock the pantry, pay special attention to items you rarely use. Get rid of anything that you don’t use; it may be tough at first, but you’ll be glad you did in the end! Move infrequent items to the highest shelf and keep frequently used food and supplies within arm’s reach.
4. **Group Similar Items Together**
To find supplies and ingredients quickly, group similar items. Keep cans together, coffee supplies in one spot, and spices organized. This way, you’ll always know where to return an item after using it, and your family will too!
5. **Use Wall Space**
One of my favorite tips for small pantries is to utilize wall space. Consider installing hooks and organizers to store spices, foil, plastic wrap, aprons, and more without taking up valuable shelf space. If you think wall space would help organize your pantry, make a trip to the store or place an order for some organizational tools!
- **Your Assignment for Today:**
- Continue working on Habit #5.
- Organize your kitchen pantry.
- Add this task to your Rainbow calendar and keep making progress!


